Pages

CPU Components

Connect the CPU Components

TechSupp247

TechSupp247

Motherboard Components

Motherboard Components

USB Protection

USB Data Protection

Wifi Printer

Wifi Printer Setup

Showing posts with label Hardware Expert. Show all posts

Friday, March 4, 2011

What is a Jaz Drive


A Jaz drive, also called a Jaz disk, is a removable hard disk drive manufactured by Iomega. According to PCMag.com, the Jaz drive was introduced to the market in late 1995.

Definition
The original Jaz disk drive was a 1GB removable disk cartridge. The updated version, introduced in 1997, had a 2GB capacity.

History
Following its introduction in 1995, the Jaz drive was popular among users in this niche, and Iomega introduced the higher capacity 2GB drives in 1997. In 2003, Iomega discontinued the manufacture of new Jaz drives, but it continued to provide customer support for existing owners. Jaz was followed in 2004 by the REVolutionary disk, or REV drive, which had a capacity of 35GB.

Thursday, March 3, 2011

How to Change a Power LED


 Many power supplies have an LED attached to indicate whether the device is powered on. Although LEDs rarely "burn out," they might need to be replaced if physically damaged by a blow. Owners of customized PCs might want to replace an LED with another of a different color to better fit the aesthetics of their design. Replacing an LED is usually straightforward, requiring one to unmount the old LED, disconnect it from its power supply, then solder and mount a replacement.

1). Disconnect the computer from the wall outlet and unplug all peripheral devices.

2). Touch a metal doorknob or other grounded bare metal surface to discharge any static electricity accumulated in your body. The electronic components in a computer are highly sensitive to static electricity and could be damaged by any buildup in your body.

3). Open the computer by unscrewing the case and slipping it off.

4). Unmount the old LED from the case. The exact method will vary depending on the specific model of computer case that you have. Some models hold the LED in place with small clips; others use glue.

5). Clip the power supply wires connected to the old LED with wirecutters. Try to do this as close to the old LED as convenient, to preserve ample wire for connecting the new LED.

6). Solder the new LED to the power supply wires. Make sure the wires' polarity and the LED's polarity matches. The negative wire is generally black, but this can vary by model. Consult your motherboard's manual if in doubt.

7). Mount the new LED in the case. Depending on what kind of case you have, you may need to use clips or glue.

8). Screw the case back on and power the machine up. Check the LED to make sure it lights.

Difference Between a Notebook Mouse & a Regular Mouse


Though model and design vary by manufacturer, the most notable difference between a notebook mouse and a regular mouse is that a notebook mouse is specifically designed for travel. Size and tracking style are specifications to consider.

Travel
Because a notebook mouse is a peripheral for a computer that users carry anywhere, they are designed to be especially lightweight and compact.

Size
Whether for a desktop or notebook computer, manufacturers design mice to fit easily in a user's hand. A notebook mouse is usually smaller in size, however. Size does not affect mouse functions. A notebook mouse does everything a regular mouse does. The smaller size of a notebook mouse translates to requiring less space in a computer bag and a lighter weight. A notebook mouse also will require less space at a workstation.

Precision
Precision is a specification that retailers will provide for consumers when making purchases. It is measured in movement resolution of dots per inch. Regular and notebook mice may provide equal dots per inch values, depending on the model. Some models of regular mouse are designed for artists or design professionals who require higher dots per inch.

Additional Features in Regular Mice
A regular mouse design may include additional buttons for users who will use the mouse over many hours in a single location--buttons for the thumb or additional roller wheels for navigation. Some notebook mouse designs incorporate these additional features, but on a smaller scale.

Ergonomic Designs
Where manufacturers emphasize travel features in notebook mice, manufacturers of regular mice emphasize comfort. Some models have ergonomic features--ergonomic fit and position-- for consumers who are likely to remain stationary and use a mouse for work sessions longer than an hour. Consumers are more likely to find ergonomic designs in regular mice. Some regular mice also may include trackballs, which are rarely seen in notebook mice.

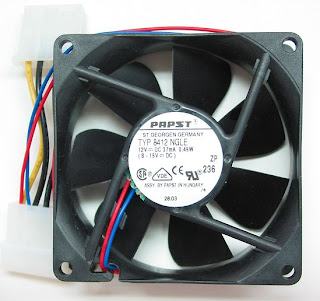
How to Clean a Processor Fan


No matter how well you keep house, there's bound to be dust floating in the air inside your home or office. Although you can easily clean this dust off furniture and other surfaces, once it gets inside a computer it can cause chip malfunctions, or, at the very least, cause your fan to operate loudly. Cleaning out your computer's fan is a necessary and common step in computer maintenance that any user can tackle without intimidation.

1). Power down your computer and disconnect all peripherals from the CPU, including the power cable.

2). Remove the computer from your workspace and take it to an open area, either outdoors or to a garage or other area that won't be harmed by dust clouds.

3). Unscrew the CPU's exterior case and remove it. Most cases are secured to the machine with a few screws around the edges of the back side.

4). Secure the fan by gently wedging the screwdriver through the vent in the back of the CPU and bracing it against a fan blade. This prevents the fan from spinning when you blow the dust off it and makes cleaning it faster and more effective.

5). Blow compressed air through the fan. Aim the air from the interior of the computer outward, so dislodged dust and other airborne particles don't settle on the circuits and connections inside the computer.

6). Replace the cover and secure it with the screws.

7). Connect your peripherals to the CPU.

Wednesday, March 2, 2011

What Is a USB Independent Host Controller?


Universal Serial Bus or USB is a method that most computers use to talk to devices such as printers, scanners, wireless mice and keyboards. If you have more devices than USB spots on your computer, then you need to use a USB Host Controller to hook up your additional devices.

What is a Controller
Managing the data sent from your computer to each device is what a controller does. Most computers come with a common controller built in. These controllers help run your standard keyboard, monitor, mouse and even your printer. However if you are looking to add additional devices to your computer you will need an additional controller to manage those devices.

Communication
USB controllers need to be able to communicate with your computer's expansion bus. The bus is the collection of wires in your computer that connect all your device controllers and add-in cards in your PC. The three most common types of buses on a PC are the AT bus, the PCI bus and the SCSI bus.

Operating System
Most of the time devices like printers, and scanners that are compatible with Windows XP are not compatible with Windows 7. The compatibility should be clearly marked on the box. This will save you the frustration of installing the product or even needing to return it back to your local store.

USB to Bluetooth Keyboards


Bluetooth keyboards use the Bluetooth protocol to allow wireless connection to the computer. These keyboards are becoming increasingly popular, since most new computers are Bluetooth-enabled, and this form of wireless connectivity has proven to be very stable.

Wireless Bluetooth Adapters
If you want to connect your existing USB keyboard wirelessly to a Bluetooth-enabled computer, one way to achieve this is via a wireless Bluetooth adapter. Wireless Bluetooth adapters allow existing USB keyboards to effectively become wireless.

Data Encryption
Wireless Bluetooth adapters use 128-bit encryption and Frequency-Hopping Spread Spectrum (FHSS). These technologies allow data to remain safe and secure.

Bluetooth Keyboards
Bluetooth keyboards have become increasingly affordable and do not require a USB to Bluetooth adapter.

Tuesday, March 1, 2011

How to Enable Iommu BIOS


IOMMU (I/O Memory Management Unit) is a feature supported by motherboard chipsets that provides enhanced virtual-to-physical memory mapping capabilities, including the ability to map large portions of non-contiguous memory. IOMMU can be enabled in the motherboard's BIOS, in order to resolve issues with virtual machine device drivers.

1). Reboot the computer and note the key specified to access or enter "Setup" in the initial boot message displayed when the computer first boots.

2). Reboot the computer and immediately press and hold down the keyboard key or keys specified in the initial boot message. Note the navigation keys specified in the BIOS setup screen that appears. Usually the keys specified are the "Up," "Down," "Left," and "Right" arrow keys to move the cursor, "Page Up" and "Page Down" to highlight a selection in a list, the "Tab" key to move horizontally through settings, and the "Enter" key to select a highlighted setting.

3). Navigate through each BIOS screen using the "arrow" keys and find the "IOMMU," "I/O Memory Management Unit," or "Intel ® VT-d"setting (usually located under the "Advanced" or "Chipset/Northbridge/Tylersburg IOH/Intel VT for Directed I/O Configuration" settings menu). Move the cursor over the setting selection box using the "arrow" keys and press the "Page Up" or "Page Down" or specified key to select "Enabled."

4). Press the "F10" key or navigate to the "Exit" menu using the "arrow" keys and move the cursor to the "Save and Exit" item and press the "Enter" key. Move the cursor to the "Yes" selection when confirmation to save settings is presented and press the "Enter" key to save the setting.

What Is a Computer Workstation?


A computer workstation is typically a standard personal computer which shares a network with a server type computer. The term Workstation refers to the computer's role in the network environment. In many business networks, there are two main types of computers available on those networks: servers and workstations. The servers house the data for the workers, and the workers perform their computing on the workstation computers. So the heavy work is performed by the workstation, and the data is provided to that workstation by the server.

Meaning of Workstation
"Workstation" refers to a relationship that a computer has with other computers.

Usage of Workstation
Usually, workstations are found connected to networks that also have a server connected.

Intended Purpose for Workstations
Workstations are usually intended to be powerful enough as to maximize computing efficiency in an office or enterprise environment.

Location of Workstation Data
Workstations connected to a business network with a server will often work on shared data that is provided by that server, so in this type of network the important data is usually controlled by the system administrator.

Workstation Operating Systems
A workstation can utilize any type of operating system that can communicate appropriately with the server. So, a workstation could be using Windows, and the server could be using Linux, and there could be a Mac OS getting data from the server too, and the workstations would still be called as such, regardless of operating system, and likewise with servers.

How to Connect a DIN CCTV to a Comp


A closed circuit television (CCTV) system is a security camera that broadcasts what it sees to a single source. Normally, a CCTV system is connected directly to a single television or a recording device, but with the right equipment, you can connect a CCTV that uses a DIN wire to your computer. You will need to use a special type of adapter to connect the DIN cable to an open USB port on your computer.

1). Run the CCTV DIN wire from the base of the camera to a spot near the computer.

2). Plug the camera's six-pin DIN connector into a six-pin DIN female-to-female adapter, which you can find at an electronics store or order from the manufacturer of your CCTV.

3). Connect the other end of the female-to-female DIN adapter to the male DIN end of the DIN-to-USB adapter. This connection must also be a six-pin connection or the setup will not work properly.

4). Make sure that the connections are tight and, if necessary, wrap the connector with electrical tape to prevent the connections from coming loose.

5). Turn on your computer and let the operating system boot up. Do not attempt to open any programs or plug anything into the USB ports until the operating system is ready.

6). Plug the USB end of the DIN-to-USB connector into the open USB port on your computer.

7). Wait for a message to pop up on your computer that reads "Found New Hardware." Click on this message and you will see a wizard that will help you identify the hardware.

8). Click "Next" and wait for the computer to search for the correct information.

9). Click "OK" when a message appears that reads "Generic USB Camera."

10). Click on "My Computer," and you will see the camera on the list of available devices. You can use this camera as you would a webcam to view, stream or record video from your CCTV.

Saturday, February 26, 2011

How to Change the IRQ Settings in the BIOS


Default motherboard BIOS settings usually do not need to be changed when the motherboard or computer is installed and will suffice for most purposes. However, if you install add-on hardware that must use a specific IRQ (Interrupt Request to the CPU), the add-on hardware will not work until the IRQ specified is assigned to that hardware component. To assign a specific IRQ to a new hardware add-on hardware component, you must access the BIOS setup pages of the motherboard.

1). Reboot the computer and press the "DEL" key to enter the AMI BIOS setup pages. Press the "Down" arrow and highlight the "PNP/PCI Configuration" item, then press the "Enter" key. Use the "Up" and "Down" arrow keys to navigate to the IRQ you wish to change. When the IRQ is highlighted, press the "PgUp" and "PgDn" keys to change the setting from "PCI/PNP" to "ISA" or vice versa. Press the "Enter" key to save the setting.

2). Press "ESC" to exit to the main BIOS setup menu. Press the "F10" key to save the configuration and exit the BIOS. Press the "Enter" key to confirm.

3). Reboot the PC and press the keys specified on the initial message displayed (either the "DEL" key or the "CTRL," "ALT," and "ESC" keys at the same time) in order to access the Award BIOS setup pages.

Use the "Up and "Down" arrow keys to navigate to the "PNP/PCI Configuration" selection, then press the "Enter" key. Use the "Up" and "Down" arrow keys to navigate to the PCI slot item to which you wish to assign an IRQ.

4). Press the "PgUp" and "PgDn" keys to select the IRQ you wish to assign, or select the "Auto" setting and press the "Enter" key. Press the "F10" key to save the setting, then press the "Enter" key to confirm the setting and exit the BIOS setup.

5). Reboot the computer. Hold down the keys specified in the initial boot message that appears ("CTRL," "ALT," and "ESC" keys or the "CTRL," "ALT," and "S" keys or the "CTRL," "ALT," and "INS" keys). The Phoenix BIOS setup main page will appear.

6). Tap the "Up" and "Down" arrow keys to move to the "Advanced" menu. Tap the "Up" and "Down" arrow keys to highlight the "Resource Configuration" or "PCI Configuration" item, then press "Enter." Use the "Up" and "Down" arrow keys to highlight the PCI slot to which you want to assign an IRQ.

7). Press the "+" and "-" keys to select the IRQ you wish to assign, or select the "Auto" or "Auto Select" setting. Press the "F10" key to save the new settings and exit. Press "Enter" to confirm you want to exit the Phoenix BIOS setup pages.

The Different Types of Computer Mice


 You can find a computer mouse for just about any use. To figure out what kind of mouse would work best with your PC, you need to know your mouse options.

·        Mechanical mouse
Houses a hard rubber ball that rolls as the mouse is moved. Sensors inside the mouse body detect the movement and translate it into information that the computer interprets.

·        Optical mouse
Uses an LED sensor to detect tabletop movement and then sends off that information to the computer for merry munching.

·        Infrared (IR) or radio frequency cordless mouse:
With both these types, the mouse relays a signal to a base station wired to the computer's mouse port. The cordless mouse requires power, which comes in the form of batteries.

·        A mouse with many buttons:
The extra buttons can be programmed to do specific things, such as navigate the Web or turn pages when you’re reading a document. The typical button-ified mouse has about five buttons.

·        Trackball mouse:
Like an upside-down mouse. Rather than roll the mouse around, you use your thumb or index finger to roll a ball on top of the mouse. The whole contraption stays stationary, so it doesn’t need a lot of room, and its cord never gets tangled.

·        Stylus mouse:
Another mouse mutation enjoyed by the artistic type is the stylus mouse, which looks like a pen and draws on a special pad.

·        Cordless 3-D mouse:
This kind of mouse can be pointed at the computer screen like a TV remote.

Friday, February 25, 2011

FireWire Vs External USB


FireWire Vs External USB

USB is the standard method used to connect a computer to any of several peripheral devices, including cameras, flash drives, keyboards, computer mice and printers. FireWire is the name for the Apple Computer version of the IEEE 1394 connection method usually used with audio/visual components.

Advantages of USB
USB has become the standard connector for the vast majority of computer peripherals, meaning those peripherals can be transferred from one computer to another with plug-and-play ease and no compatibility issues. USB video capture devices can convert your old VHS tapes to DVD.

Disadvantages of USB
USB tends to be slower than FireWire; it may run from 33 percent to 70 percent slower reading data, and from 16 percent to 48 percent slower writing data.

Advantages of FireWire
FireWire also offers plug-and-play ease of use, and its reading and writing speed outstrips USB's. Six-pin FireWire also allows peripheral devices to draw power from the computer they're connected to, so that no external power source is needed for them. Most digital video cameras are FireWire compatible.

Disadvantages of FireWire
FireWire does not work well with low bandwidth devices. FireWire ports are not standard on any non-Apple computers. While six-pin FireWire ports allow for great use of peripherals, these ports are not included on all computers.

Types of Wireless NIC


Types of Wireless NIC

Wireless NIC, or network interface cards, can be divided into categories, depending on the type of wireless network to which they are connecting. They can be internal or external by using USB ports.

The different types vary in bandwidth, range and penetration.

Wireless A
Wireless A is the first standard following the original wireless specifications. It uses the 5Ghz frequency range to avoid the overcrowded 2.4Ghz range other standards use. The 5Ghz has a limited range and does not penetrate walls as readily as the 2.4Ghz range. Wireless A is limited to 54Mbps theoretical bandwidth, which translates into 20Mbps in real conditions.

Wireless B
Wireless B was the first wireless standard adopted by the public. Because it uses the 2.4Ghz band it was limited to 11Mbps bandwidth when equipment came out at the beginning of this century. It was widely adopted because it had a lower price than Wireless A and offered a longer range and better wall penetration. Wireless B is not compatible with Wireless A equipment.

Wireless G
Wireless G is an evolution of Wireless B that uses the same type of frequency modulation as wireless A. It allows for the same 54Mbps bandwidth as wireless A, with the range and wall penetration of wireless B. Just like wireless A, the 54Mbps bandwidth is theoretical. The actual bandwidth is about half. Wireless G is compatible with wireless B equipment.

Wireless N
Wireless N is the latest standard. Many manufacturers released "Pre-N" hardware as early as 2007 to allow their customers access to the faster speed. Most "Pre-N" hardware will work only with access points and NIC from the same manufacturer. Wireless N final became available in October 2009, and allows bandwidth up to 300Mbit. Wireless N uses several antennas to transmit the data on different channels.

Wednesday, February 23, 2011

How to Convert USB to Parallel


How to Convert USB to Parallel

There are many older devices such as printers and scanners that are still in good working condition. But because technology has advanced, the parallel connectors on these devices can't connect to newer computers that only have USB ports. In order for the older devices to work with newer computers, you'll need to buy a cable that will connect to a parallel port on one side and a USB port on the other side.

1). Turn off your computer and the device before attaching the cable.

2). USB cableAttach the parallel side of the cable (the larger of the two connectors on the cable) to the device. Plug in the USB side of the cable to the computer's USB port.

3). Tighten the screws on the parallel connector to ensure there is a good connection. On the computer, make sure the USB connector is firmly attached.

4). Turn on the computer and the device. Once the computer is up and running, the operating system should automatically detect newly attached devices. If auto detection doesn't work, insert the CD that came with the device and install the software driver.

Convert PC Card to USB


How to Convert PC Card to USB

The PCMCIA (PC card) has been roundly replaced by USB devices. The sheer litany of products that are immediately functional, or require only a quick install, through the USB make multiple slots highly convenient -- for example, using a single laptop to listen to an iPod while printing off an external hard drive. Meanwhile, fewer and fewer devices use the PCMCIA format. Fortunately there are adapters available to convert a computer's PC card slot into an extra USB port.

1). Purchase a PC card (PCMCIA)-to-USB adapter. These can be found at computer and electronics stores or online. Make sure that the adapter specifically states that it is the correct type of adapter.

2). Push the card end of the adapter into the PC card slot. Make sure that the adapter is completely placed into the port.

3). Connect the USB device you wish to use to the USB side of the adapter. The adapter functions as a standard USB port, so use the device as you would through any other USB connection.

USB to PS/2 Converter Cable Is Not Detected


USB to PS/2 Converter Cable Is Not Detected

There are two kinds of USB to PS/2 adapters: straight adapters and signal converters. Adapters are designed to approximate a PS/2 port as connected to the USB port, while signal converters have internal hardware that takes the PS/2 signal and turns it into a USB signal. The hardware in signal converters allows the BIOS access and may include operating system drivers, which can alleviate many issues that users encounter with PS/2 to USB adapters.

1). Turn off the computer and reconnect all USB and PS/2 devices. Ensure that the connections are all well-seated, and fit snugly into the ports.

2). Try using a different USB port. The same hardware may function differently in different USB ports for a few reasons, including a different power output, a dusty or dirty USB port, or hardware failure within the computer.

3). Ensure that your device(s) are plugged into the right ports. If your adapter is colored, the purple connector is for keyboards, and the green connector is for your mouse.

4). Connect the keyboard and/or mouse without an adapter to another computer to make sure that the keyboard and/or mouse is still functioning. If you don't have a computer with a ps/2 port to test the devices, you may try the adapter in another computer with USB ports.

5). Try another keyboard and/or mouse with the adapter. If the adapter works well in your computer with different hardware, this may indicate a compatibility issue between your adapter and style of keyboard and/or mouse.

6). Find out if your adapter is compatible with your devices. If you're using an adapter designed to be connected to both a keyboard and mouse, without using both devices, the adapter may not function properly. The manufacturer's website should include any relevant device conflicts.

How to Make an SCSI to USB Adaptor


How to Make an SCSI to USB Adaptor

SCSI stands for Small Computer Systems Interface. SCSI was the standard to connect most computer peripherals until the emergence of USB cables. Nowadays, a vast majority of computers are equipped with USB ports for peripheral connections. However, if you have a SCSI peripheral device, you may want to build a SCSI to USB adapter so you can use it on a computer with a USB port. Note that you will need a SCSI to USB cable and a USB cable to perform this task. These cables are available for purchase in most electronic stores.

1). Connect the "SCSI" end of a "SCSI to USB" cable to your SCSI peripheral device.

2). Connect a USB cable to the "USB" end of the "SCSI to USB" cable.

3). Connect the other end of the USB cable into one of the empty USB ports on your computer.

4). Turn on your SCSI peripheral device. Wait until your computer recognizes the device and let Windows install the necessary device drivers. Once connected, you will see a notification saying that the device is connected and ready to use.

Tuesday, February 22, 2011

Vesa VGA Connector


What Is a Vesa VGA Connector?

Cable clutter is a problem that can be frustrating and counterproductive when setting up a workspace. The VESA connector attempts to solve this problem by combining many different signals into one wire.

Background
1). VESA is an acronym for the Video Electronics Standards Association, which sets standards for PC and computing environments. The VESA connector is capable of incorporating video, audio, printer, Firewire and USB connections into one wire.

Central Connection Point
2). The monitor acts as the hub for all incoming hardware connections such as the mouse, keyboard and printer. The VESA connector directly connects the monitor to the PC hardware via a 34-pin MicroCross Molex pin and socket on both sides of the wire. This essentially eliminates the need to connect each individual device to the PC directly.

Evolution
3. The VESA connector was later renamed the VESA plug and display connector. Eventually, DVI replaced the VESA connector due to its ability to support high bandwidth and enforce digital content protection.

VESA VGA Monitor


What Is a VESA VGA Monitor?

VESA is a worldwide monitoring body for a variety of computer graphics standards. They're best known for Flat Display Mounting Interfaces (FDMI), which allow monitors to attach to walls. FDMI-compliant VGA monitors are known as VESA VGA Monitors.

VESA
VESA (Video Electronics Standard Association) was founded in the late 1980s by NEC and several other monitor manufacturers. It operates primarily as a trade group to maintain common benchmarks and standards for computer video technology. VESA's other best known standard is the Display Port benchmark for mobile computers.

Monitors
VESA monitors may have one of a number of mounting interfaces. The most popular by far have a pattern of holes that are either 3 inches by 3 inches or 3 inches by 4 inches. These holes are used to screw in mounts, which are then used to attach the monitor to a wall or other surface.

VGA
The VGA standard (Video Graphics Array) is a popular benchmark for computer graphics that was developed in the late 1980s. It is best known for blocky 640x480 pixel resolution and a relatively large color palate. Although VGA is not the most popular video standard anymore, it's often used for mobile devices and specialty computers in the sciences.

General Components of a PDA


The General Components of a PDA

The use of personal digital assistants, or PDAs, as an electronic tool for organization started in the mid-1990s. Early models had expansion slots, which you could use to connect to external modems and cameras. In 2010, with numerous cell phone networks available, PDAs are nearly interchangeable with smart phones, and they share several general components.

Communication
PDAs offer many communication choices. You can develop a contact list that contains names, addresses, emails, phone numbers and special dates that link to the calendar (such as birthdays and anniversaries). From that contact list, you can make phone calls, send text messages or prepare emails. You also can place phone calls directly, either with a phone pad or voice commands.

Cell phone providers also provide internet connectivity. This allows for web browsing and the continuous ("push email") receiving of emails from your email provider.

Organizers: Calendars, Task Lists, Notes & Memos
PDAs provide different ways for organizing time. Calendars provide daily, week, monthly and specialized views and many can be synced with other PDAs or PC-based programs. Task lists provide due dates (which can appear on calendars), status checks, reminders and repeat indicators. You also can take notes on the go with general notes pages, which you can name and categorize.

Input Functionality
You can input information with a touch screen, stylus or your thumbs using a QWERTY style keyboard; some offer a combination of options. The keyboards can be physical (some may slide down for use) or virtual (accessed from a touch screen).

Media & Storage
Most PDAs provide internal digital cameras, video cameras and voice note recorders for taking and playing photos, video clips, voice notes and music. You can add to the internal memory with memory cards, and you can download your media files to your computer (for editing and storage) and to online websites for sharing.

Functions & Programs
Many PDAs offer pre-loaded functions, such as alarms, calculators or mobile versions of Microsoft Word, Excel or PowerPoint. You can activate navigation systems using GPS technology. Applications (or "apps") are popular, and PDAs can download apps that cover a variety of subjects and interests, from personal finance, gaming, education, business, entertainment, music, social networking, health and more.

Related Posts Plugin for WordPress, Blogger...

Search This Blog

Followers

Twitter Delicious Facebook Digg Stumbleupon Favorites More